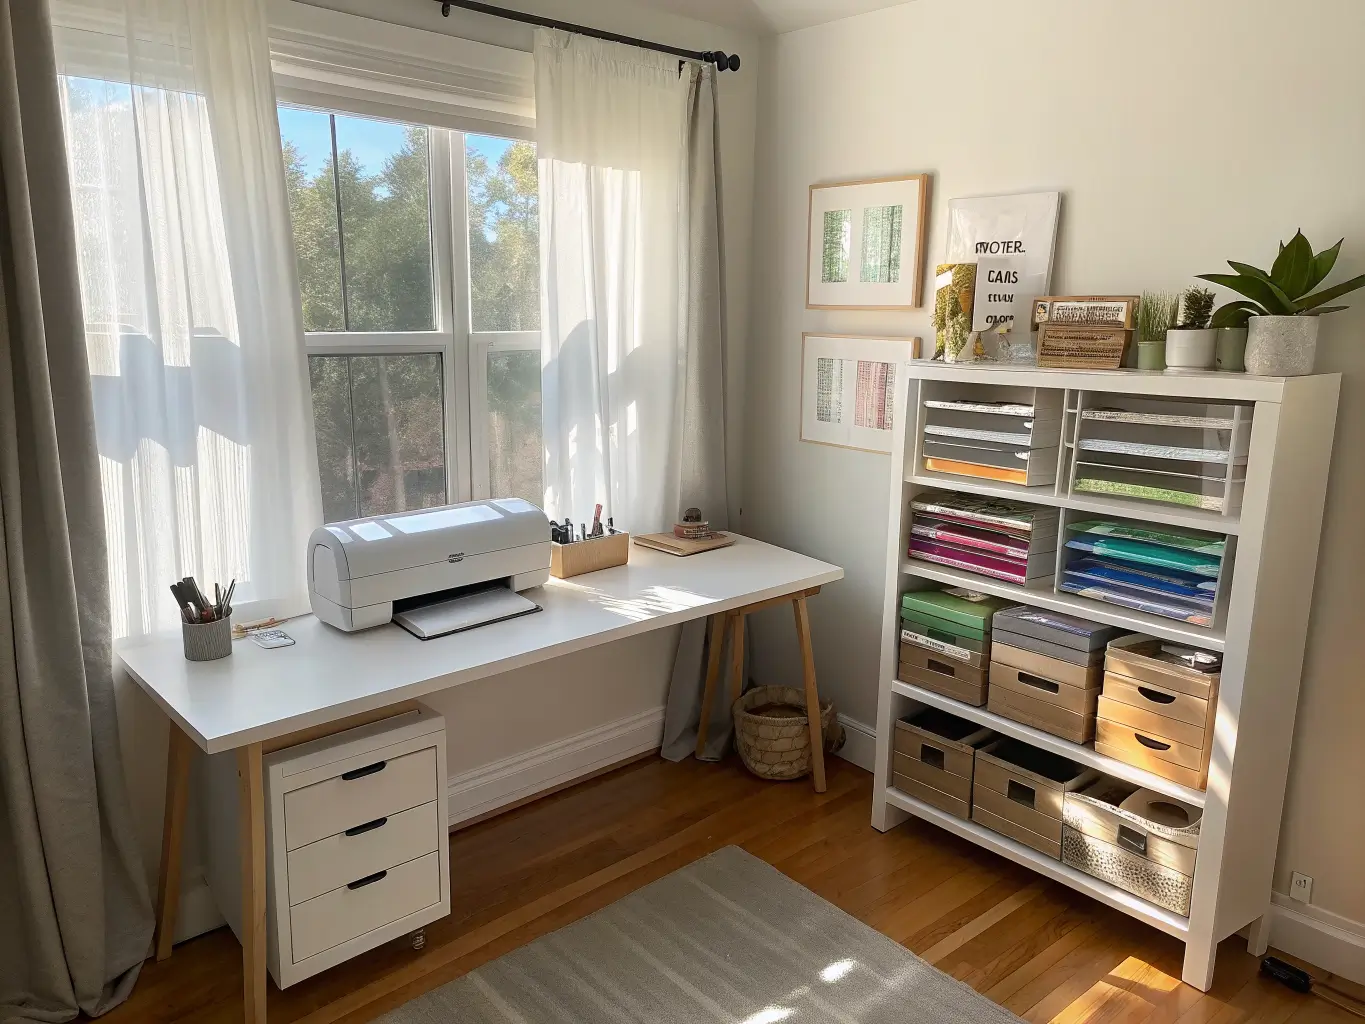
This isn’t a full room makeover most of the time — it’s a workstation. Think functional craft-room style with a foot in modern farmhouse and a foot in organized-maximalist. The look that keeps showing up in every good Cricut room tour: white bins, bamboo lids, clear acrylic, pegboards, and just enough color-coded labeling to make you feel like a person who has her life together.
It works in a literal corner. Mine is 6 feet of wall in a spare bedroom that also functions as an office. You don’t need a dedicated room — you need a dedicated zone.
Time and cost, realistically:
– A weekend gets you a fully functional setup if you’re doing bins, labels, and wall hooks
– Budget tier ($60–$150): stackable bins, drawer organizers, adhesive labels, Command hooks for a mini pegboard
– Mid-range ($150–$500): a real pegboard wall, a rolling cart, a proper desktop caddy
– Higher-end ($500–$1,500+): a dedicated cabinet system like the ones built specifically to fit Cricut Maker 3, Explore 3, or Venture with a fold-out table
I started at the budget tier and it took me almost a year to justify the pegboard. That’s fine. Do it in stages.
The Core Colors and Materials That Make It Look Pulled Together
The rooms that look good — not just organized, but actually nice to sit in — repeat the same 2–3 materials instead of grabbing whatever bin was on sale.
The formula that works: white + bamboo + clear acrylic, with one accent color for labels. I use rainbow labels on white bins with bamboo lids, and it reads as intentional instead of thrown together. The second I introduced a set of blue plastic drawers because they were cheap at Target, the whole corner looked like a garage sale. I returned them within a week.
Stick to:
– White for bins, shelving, cart bodies
– Natural wood or bamboo for lids, trays, small accents
– Clear acrylic for anything you need to see through — vinyl sheets, pens, small hardware
– One accent color for labels or hardware (I went with brushed brass drawer pulls; gold or black both work)
The Must-Have Pieces for a Working Cricut Station
You need less than you think. Here’s what actually earns its spot:
– A stable desktop wide enough for the machine plus mat clearance. Measure this before you buy anything else — my first desk was 4 inches too shallow and the mat kept catching on the edge during long cuts.
– A tool caddy next to or under the machine for scissors, weeder, scraper, and spatula — the stuff you touch every single project.
– A pegboard for anything you want visible and grabbable: hooks for scissors, small bins for blades, a spot for your weeding tools.
– Stackable bins with lids for vinyl, cardstock, and blanks, sorted by category, not by “whatever fits.”
– A pen and blade organizer — small drawers or a caddy specifically for fine-point pens, foil blades, and deep-cut blades. These get lost in general bins constantly.
– A labeling system. Rainbow labels, category labels, whatever — just label everything. I resisted this for months thinking I’d remember what was in each bin. I did not.
– A dust cover, especially if your craft corner doubles as an office or guest room. It’s a small thing but it makes the whole setup look finished instead of mid-project.
If you run more than one machine, or you’re storing bulky supplies like poster board and large vinyl rolls, a dedicated cabinet — something like the Crafit Beegrid R27 with a fold-out table — is worth the investment. It’s the difference between a hobby corner and an actual studio.
How to Set It Up: Function First, Decor Second
This is the part people get backwards constantly. They buy the cute bins and the framed prints before they’ve figured out where the machine goes. Don’t do that.
Step 1: Clear everything out.
Pull every duplicate tool, every scrap of dried-out vinyl, every piece of packaging you’ve been meaning to recycle. If you’ve still got old Cricut Craft Room software discs or files lying around — that software was discontinued back in 2018, so those are just clutter now. Toss them.
Step 2: Measure before you place anything.
Check your machine’s footprint and how far the mat needs to feed out during a cut. My Maker needs about 12 inches of clearance behind it for long cuts — I didn’t know that until I jammed a mat against a shelf mid-project and had to redo the whole thing.
Step 3: Sort into real categories.
Vinyl, cardstock, tools, mats, pens, blades, blanks, transfer tape, adhesive, weeding tools. Ten categories, ten homes. Don’t let “misc” become a category — it always turns into the drawer everything ends up in.
Step 4: Build outward from the machine.
Desktop caddy first, for what you touch daily. Pegboard or shelving next, for vertical tool storage. Bins last, for bulk supplies you’re not grabbing every five minutes.
Step 5: Add one or two decorative anchors — not more.
A small lamp, a framed cut-paper print, a single plant. I’ve got a 10-inch faux fiddle-leaf on the shelf above my machine and that’s it. Anything more and the room stops feeling like a workspace and starts feeling like a Pinterest board nobody can actually use.
Common Mistakes That Make a Craft Room Harder to Use
Overcrowding the desktop. If your work surface is covered in stuff, you have a storage problem, not a lack-of-space problem. Get it up onto the pegboard or into a bin.
Mismatched containers. I know the $4 bin at the dollar store is tempting, but three different plastic colors and finishes make a small room look chaotic fast. Pick one line of bins and stick with it, even if it means waiting to fill it out.
Ignoring cord and mat clearance. Machines need room to breathe during a cut. Don’t wedge your Cricut against a wall or shelf just to save six inches of counter space.
Not labeling enough. You will forget what’s in the third bin from the left within two weeks. Label it now.
Decorating before organizing. I did this exactly once — bought cute trays and a lamp before I’d sorted a single bin — and ended up rearranging the whole corner a month later once I actually understood my workflow. Function first, always.
Keeping the Room from Sliding Back Into Chaos
Reassess every few months. Craft supplies multiply. Set a reminder to go through bins quarterly and pull out anything that’s overflowed onto the desktop — that’s your sign a category needs a bigger container.
Repeat your materials. If you introduce a new storage piece, match it to what’s already there. New bin, same white-and-bamboo palette. This is the fastest way to keep a room looking designed instead of accumulated.
Seasonal and Style Variations
You don’t need to redecorate the whole setup to keep it feeling fresh:
– Seasonal swap: change ribbon colors on jars, rotate a few framed cut-file samples, add small seasonal tray décor
– Budget evolution: add one organizer at a time — bins and labels first, pegboard second, cabinet last
– Boho spin: woven baskets instead of plastic bins, warm wood tones, tassels on storage tags
– Modern farmhouse spin: white furniture, black hardware, bamboo-lid jars throughout
– Minimalist spin: all-white storage, clear drawers, cables tucked away, almost no visible decor at all
My own setup leans minimalist with a little warmth from the wood accents — mostly because I found out the hard way that anything too “cute” gets in the way of actually finishing projects. The room that works is the one you can walk into, grab what you need, and start cutting. Everything else is just window dressing.
For another angle on this, my small craft room ideas guide covers the same space from a different starting point.