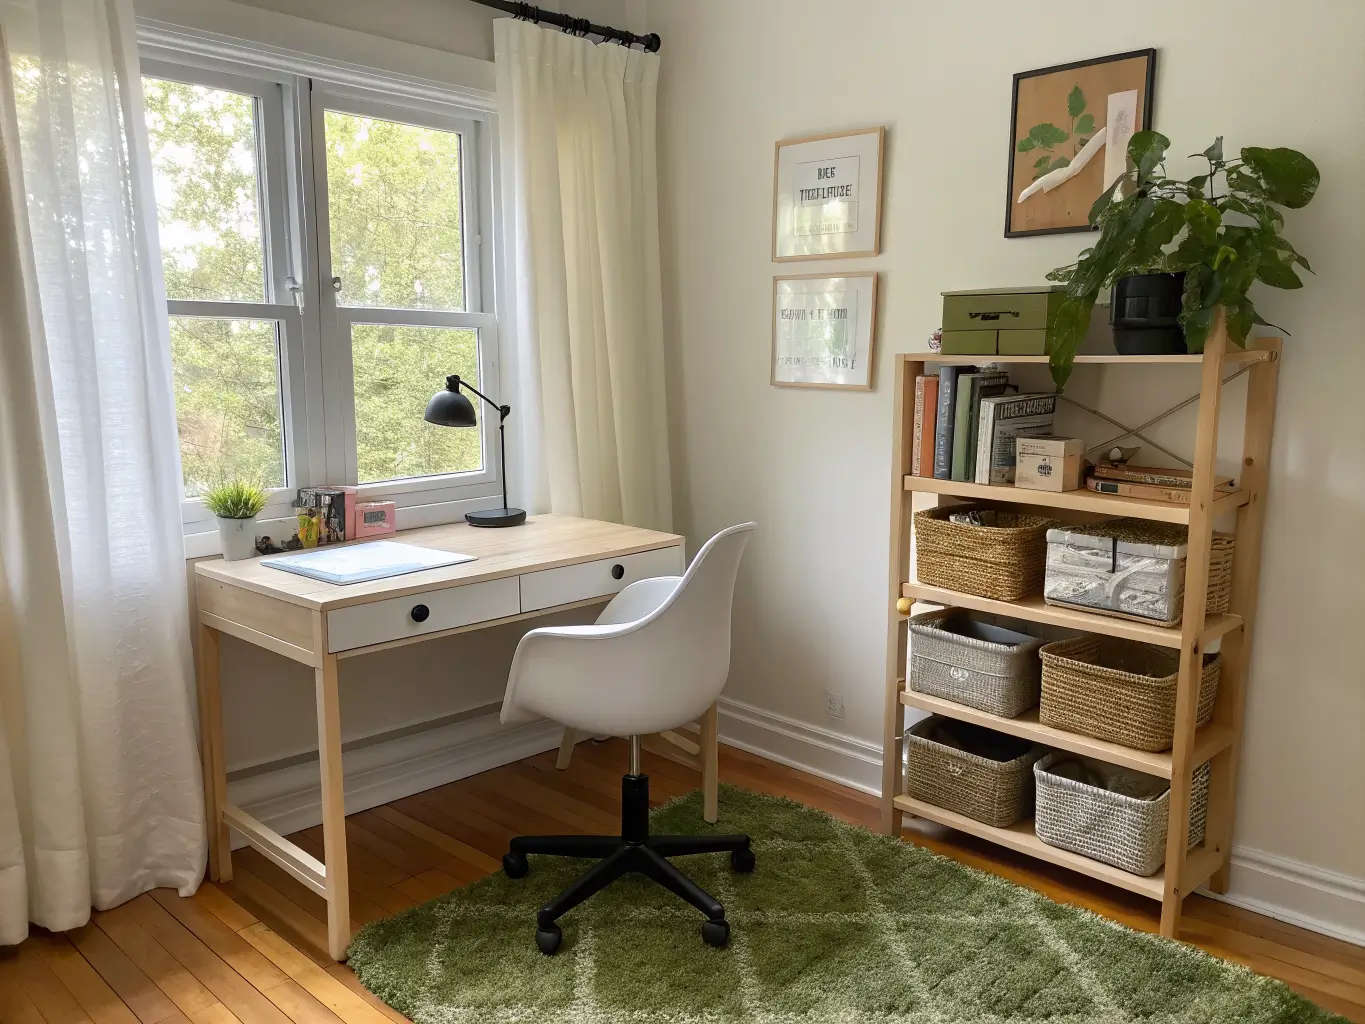
Here’s the real problem with most kids study room ideas you’ll find online: they’re styled for a photo, not for an eight-year-old with a math worksheet and forty minutes of patience.
I learned this after building my daughter a study corner so pretty I hated when she messed it up — which meant she never used it, which meant I’d wasted a weekend and about $400. The room that finally worked is not the room that looks the best in pictures. It’s the one that survived three weeks of actual homework.
If you’re trying to carve out a kids study room, here’s what I’ve figured out through two full redos and one very stubborn kid who refused to sit at any desk facing a wall.
What This Style Actually Is, and Who It’s For
The current direction in kids’ study spaces isn’t a dedicated “study room” at all — it’s a zone. A corner of a bedroom, a nook under a loft bed, a converted closet, a slice of the family room closed off with a curtain. Full separate study rooms are a luxury most homes don’t have, and honestly, most kids don’t need one. They need a spot that’s theirs, with clear boundaries, even if those boundaries are just a rug and a shelf.
This setup works best for:
– Kids who need a consistent homework spot instead of doing worksheets on the kitchen table every night
– Siblings sharing a bedroom who need visually separate work areas
– Small homes where a dedicated room isn’t realistic
– Kids who do better with a hard line between “homework mode” and “play mode”
Time and cost, realistically: A basic corner — desk, chair, lamp, some storage — takes a weekend and runs $150–$500 if you shop smart (I found my daughter’s chair at a consignment sale for $12). Add paint, real shelving, and better lighting and you’re looking at $500–$1,500 over a few days. Built-ins, twin desks, or a loft-bed combo push past $1,500 and into custom carpentry timelines of one to three weeks. I’ve done both ends of this range, and the $500 version I built myself has held up better than I expected — the $1,500 version (professionally installed shelving) was overkill for what a 9-year-old actually needed.
The Pieces That Actually Matter
Non-negotiables
The desk. Not a repurposed dining table, not a vanity — an actual desk sized for a kid. For one child, aim for 36–48 inches wide with 22–28 inches of depth. Two kids sharing? Go 54–60 inches or split into twin desks. I made the mistake of buying a gorgeous 30-inch-deep desk that looked perfect in the room and left almost no space for an open textbook plus a notebook side by side. Measure before you buy, not after.
The chair. This is where people cheap out and shouldn’t. A kid needs to sit with feet flat and knees at roughly a right angle — not dangling, not jammed up. A height-adjustable chair grows with them and costs maybe $20 more than a fixed one. Worth every cent.
Storage that isn’t just “a shelf.” Wall shelves, cubbies, labeled bins, a rolling cart — something that gets supplies off the desktop. I use a $15 rolling cart from Target with three bins: one for daily supplies, one for art stuff, one for “current project” clutter that would otherwise take over the desk.
Layered lighting. Overhead light alone causes glare and eye strain, especially on glossy worksheets. Add a real task lamp — I like the classic articulating desk lamp style, $25–$40, because you can angle the light exactly where the work is. If the budget allows, a slim LED strip under a shelf adds ambient warmth without adding another lamp to knock over.
Wall organization. A pegboard or corkboard turns a blank wall into a system — hang scissors, tape, a calendar, this week’s spelling list. Cheap, flexible, and it keeps clutter vertical instead of horizontal across the desk.
Zone markers. A rug under the desk, a curtain that closes off a closet-turned-study-nook, even a stripe of paint — anything that visually says “this is the work spot” versus “this is the rest of the room.” Kids respond to this more than you’d expect. My son’s whole attitude toward homework shifted when we put down an $18 washable rug that marked “his” square of the shared bedroom.
Nice-to-haves, once the basics work
– A plant in the corner — a small pothos on the shelf does more to soften a study nook than another framed print
– Chalkboard paint on one panel or a small framed chalkboard for younger kids who like to doodle between problems
– A themed accent wall (we did a solar-system decal wall for about $30 — peel-and-stick, no regrets, easy to remove when the interest fades)
– Brass or matte black hardware on drawers if you want the space to feel a step up from purely functional
– Woven baskets instead of plastic bins, if you want texture without losing the organizing function
Skip the themed furniture — the rocket-ship desk, the car-shaped chair. Kids outgrow themes in about a year and you’re stuck with a $300 desk that only works with one aesthetic. Theme the wall instead. It’s a $30 decal, not a $300 desk.
How to Put It Together
Start with the anchor piece. Desk first, always. Everything else gets arranged around it. If you’re doing a loft-bed study combo, the desk placement is baked into the bed’s design, so measure that clearance before you buy anything else.
Build up, not out. Once the desk is placed, add vertical storage — shelves, pegboard, a tall narrow cabinet. Small rooms live or die on wall height usage. My first attempt at my daughter’s nook used only floor-level storage and the room felt cramped within a month. Moving the same bins onto wall shelves freed up floor space and instantly made the room feel bigger, without changing the square footage.
Light it properly. Ambient light for the room, a task lamp for the desk. If there’s a window, place the desk perpendicular to it, not facing it and not with it directly behind. Facing a window means glare on the face and eventually the eyes; window at the back means glare on the paper. Perpendicular is the only angle that avoids both, and it’s the one detail almost every guide agrees on for good reason.
Finish with function, not decoration. A bulletin board for the week’s schedule, a label system on the bins, maybe one or two motivating pieces of art — not a shelf full of knickknacks. The goal is a desk that looks almost bare when it’s not in use. That’s not sterile, that’s smart. Storage does the work so the desktop doesn’t have to.
For shared rooms, don’t just push two desks together and call it done. Use a T-shaped layout, twin desks facing opposite walls, or a shelf unit as a soft divider between them. My two kids share a room and the single fix that stopped the daily “he’s on my side” arguments was a $40 open bookshelf turned sideways between their two desks. Visual separation, still one room.
Common Mistakes I’ve Made So You Don’t Have To
– Wrong desk height. I once used a regular dining chair with a kid-sized desk and my son sat with his knees jammed above the desktop for two weeks before I noticed why he hated sitting there.
– Over-styling the desktop. I put a cute ceramic pencil cup, a small clock, a framed photo, and a desk plant on my daughter’s desk. It looked lovely. It also left her about eight inches of actual workspace. Everything decorative moved to the shelf above; the desk got one lamp and one organizer.
– Desk facing the window. Glare on a laptop screen at 4pm every afternoon, until I rotated the whole setup 90 degrees.
– No storage system, just storage. Bins without labels become junk drawers within a month. Labels — even hand-written ones on masking tape — make kids actually put things back.
– Skipping zoning in shared spaces. Kids will use the whole room as one big pile if you don’t give them a visual line to respect.
Keeping It Fresh Without Redoing the Whole Room
Stick to one base color family plus one or two accents — I run white and warm wood as the base in both my kids’ spaces, then let one accent color (green for my daughter, blue for my son) show up in the rug, a cushion, and one wall element. It keeps the room cohesive even though the two spaces are personalized.
Repeat materials instead of introducing new ones every time you refresh. Same wood tone on shelf and desk, same black metal on lamp and drawer pulls. It reads as intentional even when it’s assembled from five different stores over two years, which, in my house, it was.
For actual seasonal refreshes: swap the desk mat, pencil cup, and cushion covers. Add a new bulletin board layout. These cost under $30 total and take twenty minutes, and they make the space feel new without touching the furniture.
If you’re starting from scratch and want to build up slowly, don’t buy everything at once. Start with a compact desk, one wall shelf, a task lamp, and labeled bins. That’s the entire functional core, and it runs under $300 if you shop sales. Add the pegboard, the rug, the reading nook, the built-ins — whenever budget and patience allow. The room I’m proudest of took eighteen months to finish, one piece at a time, and my kids never noticed it wasn’t “done” because it worked from week one.
For another angle on this, my children study room ideas guide covers the same space from a different starting point.