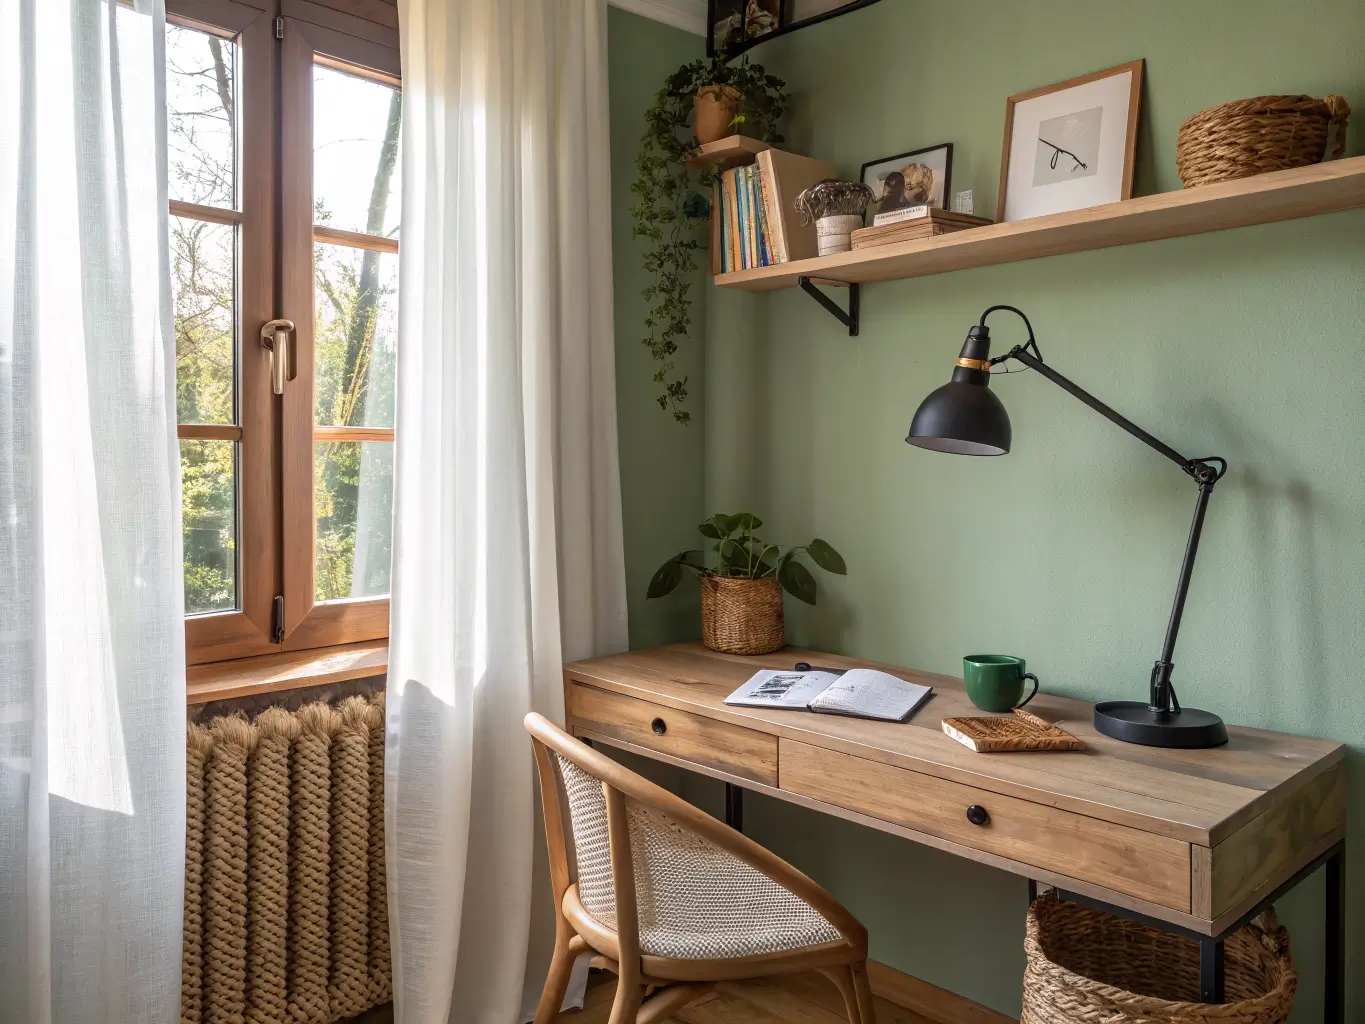
Every study room I’ve ever seen fail had the same problem: someone bought a pretty desk and called it done. Then six months later it’s a junk surface with a laptop balanced on top of a stack of unopened mail. If you’re trying to figure out study room design that actually gets used instead of just photographed once for Instagram, the answer has almost nothing to do with how the room looks on day one. It’s about lighting, storage, and chair height — the unglamorous stuff nobody puts in the mood board.
I’ve built three of these now. One in a rented apartment with a single weird-shaped alcove, one in a spare bedroom, and my current setup, which is a 6-foot stretch of wall in a room that’s technically supposed to be a guest room but has hosted maybe four guests in as many years. Here’s what I’ve learned works.
Quick Style Snapshot: Time, Cost, and Scope
Setup time depends entirely on how much you’re building versus buying. A basic desk-and-lamp nook comes together in a weekend — I did my first one in about 6 hours, most of which was spent assembling a flat-pack desk and swearing at an Allen wrench. A full room with paint, shelving, and proper lighting takes 3 to 7 days, mostly because paint needs to dry and shelving needs to get mounted straight, which takes longer than you think if you’re doing it alone.
Budget-wise, here’s roughly what you’re looking at:
– Basic setup ($200–$600): A simple desk, a decent chair (not great, decent), a clamp-on task lamp, and some bins or a small shelf.
– Mid-range ($800–$2,500): Better ergonomic seating, real shelving or a small built-in, layered lighting, a rug, and window treatments.
– Custom/high-end ($3,000+): Millwork, acoustic paneling, designer lighting, the works.
I spent close to $1,100 on my current setup and the single biggest lesson was that I underspent on the chair the first time around and paid for it in a stiff lower back within a month. More on that below.
Space requirements are flexible. A wall-mounted fold-down desk works in a corner as narrow as 24 inches. A full room needs enough clearance to push the chair back without hitting a wall — figure at least 3 feet behind the desk for comfortable movement.
Skill level: assembling furniture and hanging art is beginner territory. Built-ins, hiding cables in walls, or wall-mounted floating desks lean intermediate to expert unless you’re comfortable with a stud finder and don’t mind a few extra holes in the drywall.
This is a year-round project — no season really demands a study room, which means you can start whenever the frustration with your current setup hits a breaking point.
What Style Actually Works Here
The dominant look right now isn’t fussy or trend-driven. It’s calm, functional, and quiet — a blend of modern and Scandinavian influence with warm neutral undertones instead of anything stark or clinical. Think soft mid-tone blue or sage green walls, natural wood surfaces, and matte finishes everywhere. No gloss. Gloss creates glare, and glare is the enemy of a room whose entire job is to help you concentrate.
This style suits:
– Students prepping for exams
– Remote workers who need separation from the kitchen table
– Kids doing homework
– Anyone who reads or works from home and needs a quiet zone that isn’t also the dining room
It works best in a spare bedroom, an underused corner, or an alcove near a window — as long as you can control how much direct light hits the desk. I learned that the hard way in my first setup: gorgeous morning light, completely unusable by 10am because the sun hit my laptop screen dead-on.
The Must-Have Pieces
Skip decorating instincts for a minute and start here. These are non-negotiable.
The desk. Size the desk to the room, not the other way around. A standard work surface sits around 710–740mm (28–29 inches) high. If your space is tight, go wall-mounted or floating — I’ve used a floating desk in a narrow hallway nook and it worked better than a bulkier freestanding one would have.
The chair. This is where I’d tell you not to cheap out. My first study chair was a $60 desk chair that looked fine and felt fine for about three weeks. Then my back started aching after an hour of sitting. I replaced it with a chair with actual lumbar support and adjustable height, closer to $250, and it was the single best upgrade I made in the whole room. If you’re spending money anywhere, spend it here.
Task lighting. A desk lamp with an adjustable arm and a warm-neutral bulb — aim for 3000–4000K color temperature and around 300–500 lux on the work surface. Overhead light alone isn’t enough; it creates shadows over your own hands when you’re writing or typing. I use a simple brass-armed lamp that clips to the edge of my desk and it’s done more for eye strain than anything else in the room.
Storage. Shelves, cabinets, bins, whatever fits — but plan for it before you style anything. A study room without a place to put paper immediately becomes a room with paper everywhere.
Window treatments. If your desk is anywhere near a window, get blinds or curtains that let you dial back glare without blacking out the room entirely.
A rug. Especially if you’re on hardwood or laminate — it absorbs sound and keeps the room from feeling sterile.
A pinboard or whiteboard. Genuinely useful for schedules, not just decorative. Mine holds a running to-do list and it’s the one “decor” item that gets used daily.
A few decor accents. One plant, a couple of framed prints, maybe a photo. Enough to make it feel like your room, not so much that it competes with the work surface.
Optional Enhancements Worth Considering
Once the essentials are in place, these add polish without adding clutter:
– Organic textures — a woven basket for cables or supplies, a wood tray for catching loose pens, linen curtains instead of synthetic ones. These soften a room that could otherwise feel like an office supply closet.
– Metallic accents — brass lamp bases, black metal drawer pulls, a thin black picture frame. Small doses sharpen a neutral palette without making it busy.
– Acoustic touches — if your room echoes (mine did, before I added the rug and a fabric-covered bulletin board), a thicker rug and a fully loaded bookshelf actually help absorb sound.
– Multifunctional furniture — a storage ottoman that doubles as extra seating, or a desk with built-in drawers instead of a separate filing cabinet.
– Seasonal swaps — change a throw pillow, swap an art print, add a warmer lamp shade in winter. Keep the bones the same; refresh the surface.
Pro Tips for Pulling It Together
Use the 70–20–10 color rule. Seventy percent of the room in a calm base color (your wall and largest surfaces), twenty percent in a secondary tone (furniture, rug), ten percent in an accent (a plant, a piece of art, a lamp). This keeps the room from feeling either boring or chaotic.
Layer texture, not pattern. A patterned rug plus patterned curtains plus a patterned throw pillow starts to feel like visual noise fast. Instead, mix matte wall paint with a wood desk, a woven basket, and a textured rug. Same visual interest, way less distraction.
Place the desk for light, not symmetry. It’s tempting to center the desk under a window because it looks balanced. Don’t, unless you’ve tested it at the time of day you’ll actually be working. Perpendicular to the window, or angled so light comes from the side, usually beats a full face-on window view.
Give the room one focal point. Mine is a floor-to-ceiling bookshelf directly across from the desk. Everything else — the art, the plant — supports that instead of competing with it.
Hide the cables. Nothing undoes a clean look faster than a nest of cords under the desk. A $15 cable sleeve or a binder clip and some zip ties solves 90% of this problem.
Setting It Up: Step by Step
Prep the space first. Clear out old furniture, stray papers, anything that doesn’t belong. Check where your outlets are — this genuinely determines where the desk can go, so do it before you fall in love with a layout. Test the light at different times of day if you can. I moved my desk three times in the first two weeks of owning it because I skipped this step and kept discovering new problems (glare at 2pm, a draft from the window at night, an outlet just out of extension-cord reach).
Build big to small. Desk, chair, storage, and lighting go in first — these are the pieces that actually determine whether the room functions. Everything else is decoration layered on top of a working system.
Add vertical storage next. Shelves and wall-mounted organizers keep the floor open and the room feeling bigger than it is, especially useful in a small nook.
Bring in soft layers. Rug, curtains, any upholstered seating. This is where the room starts to feel finished instead of just functional.
Finish with a small number of decorative objects. One or two framed pieces, a single plant, the lamp, the pinboard. Resist the urge to keep adding things — a study room accumulates clutter fast if you let every surface hold something.
Common Mistakes (And What I’d Do Differently)
– Overhead light only. Causes shadows and eye strain over hours of work. Combine ambient light with a task lamp — always.
– Overdecorating the desk. If there’s no clear surface to actually work on, the room isn’t doing its job. Keep the desktop mostly empty.
– Cheap, unsupportive seating. I already told you about my $60 chair mistake. Don’t repeat it.
– Glare from glossy paint or bad desk placement. Matte or eggshell finish on walls, and test your desk position against the sun before committing.
– No real storage plan. Bins and shelves aren’t optional extras — they’re what keeps the “productive” version of the room from turning into the “pile of stuff” version within a month.
– Loud, saturated wall colors. A bright red or intense yellow wall might look striking in photos, but it’s overstimulating for a room meant to help you focus. Muted sage, soft blue, warm beige — these hold up better over years of actual use.
Keeping the Room Fresh Without Starting Over
Stick to two or three main colors plus one accent family. My room is warm wood tones, soft white walls, and matte black metal accents — that’s it. Repeating those same materials (wood shelf, wood desk, black lamp, black drawer pulls) makes the room feel put-together even though nothing in it matches perfectly.
Rotate personal items instead of adding more. When I want to refresh the space, I swap out the art print or change what’s pinned to the board rather than buying something new to add to the pile.
Budget refreshes that don’t touch the big furniture: new desk accessories, a different lamp shade, a fresh coat of paint on one accent wall, a new cushion for the chair. These cost under $100 combined and can make a tired room feel new again.
Seasonal tweaks are simple — heavier textiles and warmer lamp light in winter, lighter linen and brighter accessories in summer. Plants stay relevant year-round, so don’t feel like you need to swap those out.
Cross-style combos worth trying:
– Modern + Natural — clean-lined desk, warm wood tones, a couple of plants, linen curtains.
– Minimal + Academic — built-in shelving, muted blue or sage walls, a pinboard, almost nothing on the desk surface.
– Compact + Multifunctional — wall-mounted storage, a floating desk, one small chair that could double as reading seating.
The room that works isn’t the one that looks best in a photo taken from the doorway. It’s the one you can sit in for two hours without your back hurting, without squinting at your own shadow, and without shoving papers aside just to find your keyboard. Get the desk, chair, and lighting right first. The decorating part is the easy 20%.
For another angle on this, my cozy home office guide covers the same space from a different starting point.