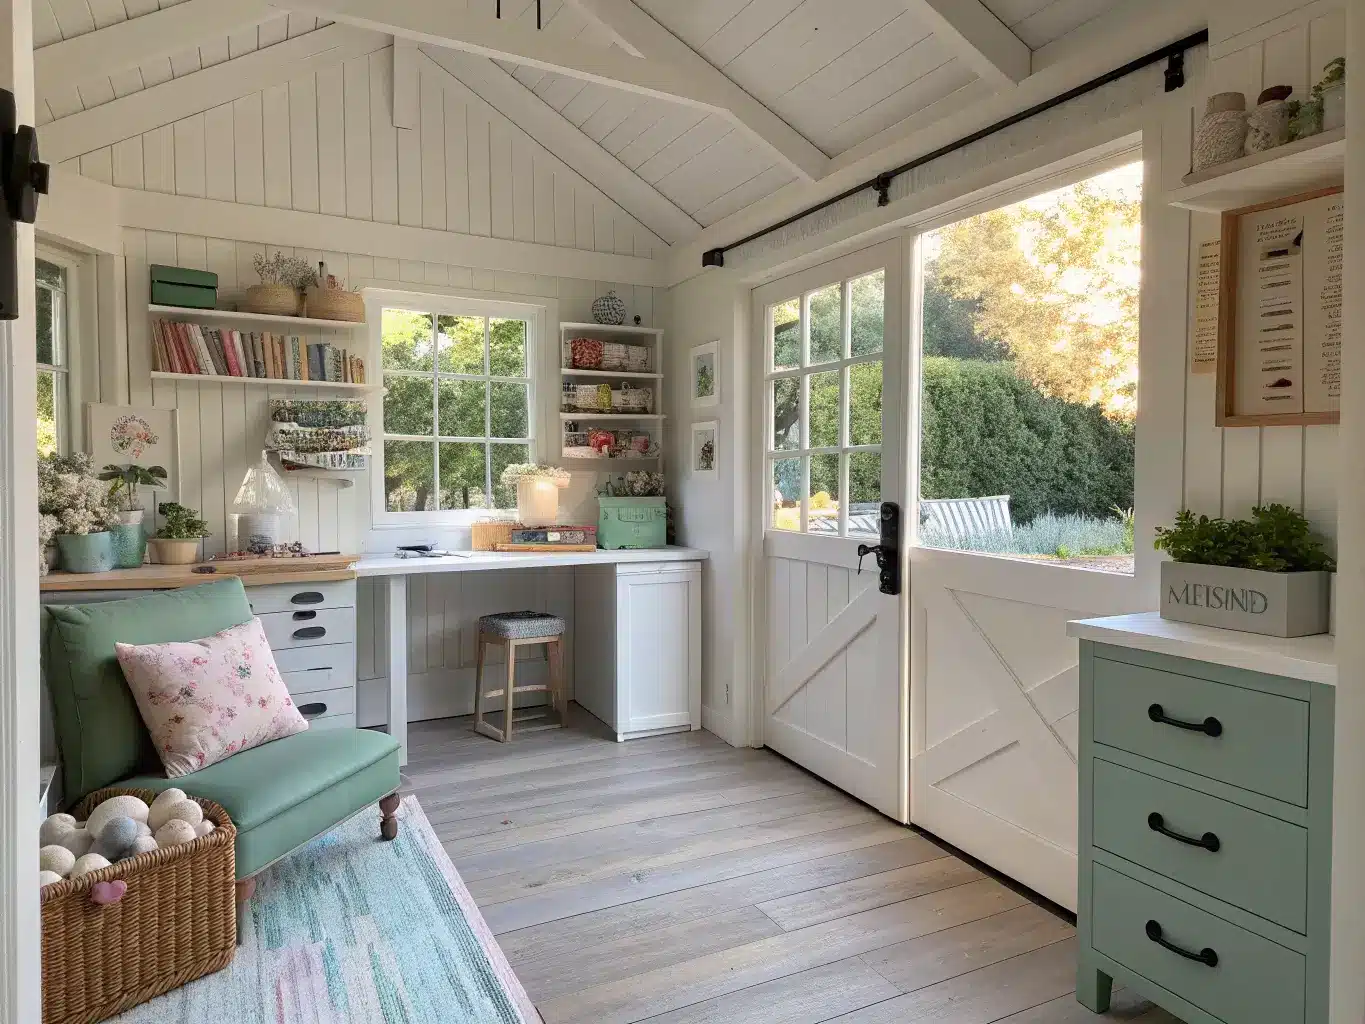
I turned my dad’s old tool shed into a sewing room three summers ago, and the first thing I got wrong was decorating before I fixed anything. I hung curtains and stacked pretty jars on a shelf while ignoring a soft spot in the floor near the door. Six weeks later I was pulling up rotted plywood and starting over. So here’s the thing about she shed craft room ideas: the styling part is the fun part, but it’s the last part. Get the bones right first, and the decorating actually sticks.
If you’re staring at a backyard shed wondering whether it can become a real craft studio, it can. I’ve done it twice now — once in that inherited tool shed, once helping my sister convert a prefab 10×12 into a scrapbooking room. Here’s what actually works.
Quick Style Snapshot: Time, Cost, and Size
Time: A basic refresh — paint, a table, some shelving, decor — takes one to three weekends. If you’re adding insulation, running electrical, laying flooring, swapping windows, or building custom storage, budget two to eight weeks, longer if you’re doing it yourself around a day job like I was.
Cost: A styling-only makeover can run a few hundred to about $2,000 depending on how much furniture you’re buying versus thrifting. A full conversion — insulation, outlets, flooring, built-ins — commonly lands in the several-thousand-dollar range. My sister’s 10×12 conversion, done mostly by a contractor for the electrical and DIY for everything else, landed around $4,200 total.
Space size: The sweet spot is 10×12, 10×16, or 12×20. Anything smaller and you’re choosing between a worktable and a storage wall — you can’t have both comfortably. My tool shed is 10×14 and it’s tight but workable for one person sewing. My sister’s 12×20 has room for a table, full storage wall, and a reading chair in the corner.
Skill level: Decorating and organizing is beginner-friendly. Insulating, wiring outlets, or building custom shelving pushes you into intermediate-to-expert territory, or means calling an electrician — which I did, because I am not messing with wiring in a wood structure ten feet from my house.
Seasonal vs. year-round: A shed can absolutely be a year-round studio, but only if you deal with temperature, ventilation, and moisture first. A shed that’s gorgeous in June and unusable in January isn’t a craft room, it’s a very cute storage unit.
The Design Identity: Cottage Practicality, Not Pinterest Fantasy
Most she shed craft rooms I’ve seen — and built — land somewhere between cottage-core, farmhouse, and shabby chic, but with actual studio bones underneath. White walls. Pastel or sage accents. Storage you can see, not just storage you can close a door on.
Colors and materials that show up again and again:
– Bright white walls (by far the most common base)
– Soft blue, sage green, or blush accents
– Wood shelving and pegboard
– Glass jars, woven baskets, metal bins
– Wipeable tabletops — laminate or sealed wood, not raw wood that stains
Who this is for: anyone who sews, quilts, scrapbooks, paints, makes cards, or runs a small craft business out of their house and is sick of packing everything into a closet between sessions. If you’re currently crafting on your kitchen table and clearing it off before dinner every night, this is for you.
Where it works best: an existing backyard shed, a converted garden shed, an old playhouse the kids outgrew, a detached garage, or a prefab structure bought specifically for this. The one requirement is enough wall space for real storage plus one clear work zone.
Must-Have Items for a She Shed Craft Room
Don’t buy decor first. Buy these first, in roughly this order.
– A sturdy worktable or craft desk. This is the hero piece, full stop. I use a 60-inch laminate folding table because it’s wipeable and I can fold it flat if I ever need the floor space. If you sew, look for something at least 24 inches deep — anything shallower and your machine hangs off the edge.
– Pegboard or a wall-mounted tool system. Mine holds scissors, rulers, a cutting mat, and ribbon spools on cup hooks. It’s the single best organizing move I made, and it cost about $35 in board and hardware.
– A mix of closed and open storage. Drawers and bins for the ugly stuff — extension cords, extra fabric scraps, backstock. Open shelves and labeled jars for anything you want to grab fast.
– Task lighting. A desk lamp positioned so it doesn’t cast your own shadow over your work, plus overhead lighting for the whole room. If you’re running a sewing machine, iron, or printer, you need outlets near the table — not one outlet by the door that everything has to extension-cord to.
– Comfort seating. A cushioned chair or rolling stool if you’re at the table for hours. I sat on a hard folding chair for a month before my back made the decision for me — a $60 rolling office chair from a thrift store fixed it.
– Decorative storage that’s actually functional. Glass jars for buttons and beads, labeled boxes for patterns, crate shelving for fabric bolts. This does double duty as organization and decor, which is the whole trick of this style.
– Softening accessories. Curtains, a couple of throw pillows if there’s seating, a piece of framed art, one small plant. This is what makes it feel like a room you want to be in, not a shed you’re using.
Optional Enhancements Worth the Money
Once the essentials are in, these are the upgrades that make the room feel finished rather than functional:
– String lights along a beam or shelf edge — cheap, and they make evening crafting sessions feel less like you’re working in a shed after dark.
– Shutters or gingham curtains if you’re leaning cottage or farmhouse and want the outside to match the inside.
– Natural touches: a woven basket for yarn, a terracotta pot with a trailing pothos, a small bundle of dried eucalyptus on the shelf. Soft counterweight to all the hard surfaces.
– One metallic or brass piece — a lamp, a picture frame, drawer pulls. In an all-white room, one warm metal accent stops it from feeling clinical. I swapped my plain white cabinet knobs for $4 brass ones and it made the whole cabinet look intentional instead of leftover.
– Seasonal swaps: a different table runner, a bowl of pinecones in November, pastel accessories in spring. Small changes, same layout.
Pro Styling Tips That Actually Change How the Room Feels
Paint the walls white or very pale first. I cannot stress this enough — it’s the single fastest fix for a small dark shed. My tool shed had dark wood paneling when I started, and painting it Behr’s “Ultra Pure White” in a satin finish (satin because it wipes clean, unlike flat) made the room feel almost twice as big before I’d added a single piece of furniture.
Zone the room into at least two areas. Work zone, storage zone, and if you have the square footage, a small seating corner. Don’t let the whole room blur into one undefined craft blob.
Pick one accent color, not three. If your fabric stash or paint supplies are already a rainbow, your walls and furniture need to calm down and let the supplies be the color. I learned this one the hard way — I painted a feature wall sage green and then filled the room with pink and yellow fabric bolts, and it looked like a kid’s birthday party. Repainted it white within a year.
Keep the main work wall clear. Whatever wall has your best light or your pegboard, protect it from clutter. That’s your focal point — don’t let a random stack of boxes creep onto it.
Mix hard and soft textures on purpose. White wood, metal bins, and clear acrylic organizers read cold on their own. Add a curtain, a cushion, a woven basket, and the room stops feeling like a supply closet.
Setup and Execution, Step by Step
Before you decorate anything:
1. Clear the shed completely. Every box, every cobweb, every old paint can.
2. Check for damp, woodworm, or a soft floor. Press on the floorboards near the door and any corners — that’s where water usually gets in first.
3. Decide what kind of crafting you’re doing. Sewing needs a deep table and machine storage. Scrapbooking needs flat surface space for paper. Painting needs ventilation and a floor you don’t mind splattering. This decision shapes every purchase after it.
4. Figure out power needs now, not later. If you’re running a sewing machine, iron, and a phone charger at once, one outlet isn’t going to cut it.
Then, building the look:
1. Paint first — light wall color, whole room.
2. Bring in the worktable and put it under or near the best natural light source.
3. Install wall storage — pegboard, shelves, whatever fits your craft type.
4. Sort supplies into clear jars, labeled bins, and baskets by category, not by “junk drawer.”
5. Add the last-mile stuff: stool, lamp, curtain, rug, a plant, one piece of framed art, a comfortable chair if there’s room.
Common Mistakes I’ve Seen (and Made)
– Treating it as storage, not a studio. If every surface is covered in stacked bins and there’s no clear table to actually work on, it’s just an organized shed, not a craft room. Reserve one real work zone and protect it.
– Skipping insulation or lighting to save money up front. A shed that hits 95 degrees in July or goes dark at 4pm in December doesn’t get used, no matter how cute it looks in photos.
– Overcrowding a small footprint. In a 10×12, you don’t have room for a reading nook, a display wall, AND a full storage system. Pick two.
– Making everything opaque storage. If every bin is a solid color with no labels, you’ll spend more time hunting for supplies than crafting. Mix in clear jars and open shelves for anything you use often.
– Decorating before prepping. I already told you about my floor. Don’t do what I did.
Keeping It Fresh Without Redoing the Whole Room
Stick to two or three colors plus neutrals — white, sage, and natural wood, or white, pastel blue, and brass. Repeating one material family (wood shelves throughout, or the same style of woven basket in three sizes) makes the room look pulled together instead of accumulated.
Rotate your finished projects on display so the room feels lived-in and active without turning into clutter. I swap what’s pinned to my corkboard every couple of months.
Budget-friendly build-out order: paint, then table, then shelves, then labeled storage, then decor last. Resist buying the cute stuff first — it’s tempting, but it’s also how you end up with a pretty room that doesn’t function.
Seasonal tweaks that don’t require touching the layout: swap textiles, change what’s in your jars on display, add a seasonal floral arrangement, switch out the table runner. The bones stay the same; the surface changes with the year.
Cross-style combos that work: boho woven baskets against farmhouse white walls, or coastal blue accents layered into a cottage-style shed. These pair easily because the white-and-natural-wood base is neutral enough to take on almost any accent direction.
The highest-impact low-cost upgrades, in order of what I’d do again: pegboard, string lights, a thrifted chair with a slipcover, and repurposed glass jars or wooden crates for storage. All four together cost me under $150 and did more for the room than anything else I bought.
For another angle on this, my craft room decor guide covers the same space from a different starting point.