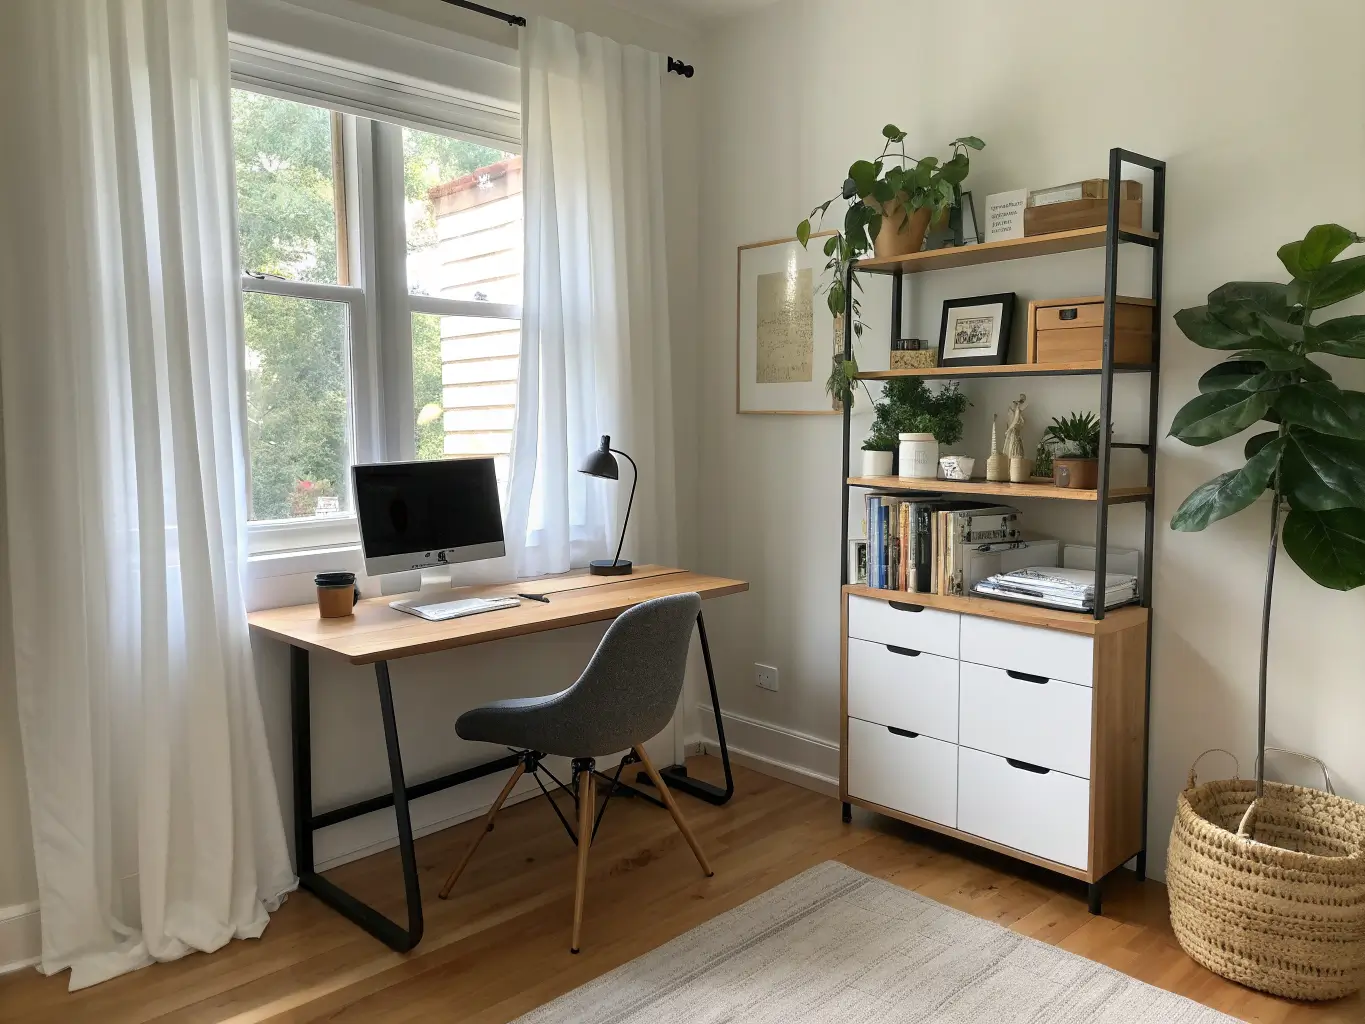
This is a functional modern minimalist approach — clean lines, contained storage, almost nothing decorative on the desktop. Depending on your finishes, it slides into Scandinavian (pale oak, white, woven texture) or a warmer contemporary look (black metal, walnut, brass hardware). Either way, the bones are the same: closed storage does the heavy lifting, and only a handful of objects are ever visible.
It’s built for remote workers, students, freelancers, and anyone sharing a bedroom corner or closet with a desk. I’ve set up versions of this in a 6-foot dorm-style alcove and in a full spare bedroom, and the principles didn’t change — only the scale did.
Time and cost, realistically:
– A basic desk reset (declutter, organize drawers, add cable management) takes 2–6 hours and costs $50–$150.
– A full system — filing cabinet, shelving, cart, pegboard, monitor riser — runs 1–2 days of work and $200–$600+, depending on finishes.
– Skill level: beginner. There’s no building involved unless you want floating shelves. It’s 90% decisions, 10% assembly.
This works year-round. The only seasonal element is swapping a tray or basket, which takes five minutes and costs under $20.
The Pieces That Actually Make This Work
Don’t buy anything until you’ve read this list and matched it against what you actually own.
Desk surface essentials:
– A desktop caddy or small tray for pens, sticky notes, and whatever you touch daily
– A letter sorter or inbox tray — one, not three
– A monitor riser (I use a $35 bamboo one from Amazon; it raised my screen 4 inches and gave me a shelf underneath for my laptop when I’m not using it)
Cable management:
– Cable sleeves (the fabric wrap kind, not the plastic clips — they last longer and look better)
– Cord labels, even just masking tape and a Sharpie
– One designated charging zone, ideally near an outlet you never move
Paper system:
– Inbox tray (for anything unprocessed)
– A hanging file rack or small filing cabinet
– A shred bin — this alone cut my paper pile by half within a month
– Labels for every folder, no exceptions
Vertical storage:
– Floating shelves or a pegboard above the desk — this is the single highest-impact change you can make in a small office, because it removes the temptation to store things flat
– A bookcase if you have wall space and reference materials
Drawer inserts: cheap plastic or bamboo dividers, $8–$15 each, for pens, clips, and tech accessories that otherwise migrate to the bottom of a junk drawer.
Rolling cart: if you have a printer or an active project that doesn’t fit the desk, a cart gives it a home that isn’t “on top of everything else.”
Optional Touches That Keep It From Feeling Like a Cubicle
A fully utilitarian office reads cold fast. I learned this the hard way — my first version of this setup looked like a bank teller’s station. Three small additions fixed it:
– One plant. I keep a 6-inch pothos on my shelf because it survives my inconsistent watering schedule. A fiddle-leaf fig if you have floor space and better plant instincts than I do.
– Natural texture. A seagrass basket for cords or extra notebooks softens all that matte metal and MDF.
– One metallic accent — I switched my pen cup to brushed brass and it did more for the “finished” feeling than anything else I bought that month.
Seasonally, I swap a light linen tray for a darker wood one in fall. That’s it. The furniture never changes.
How to Put It Together, Step by Step
Start empty. Take everything off the desk and out of the drawers. You cannot organize around clutter you haven’t seen in full — you can only rearrange it.
Sort into piles: keep, relocate, donate, shred, file, action. Be honest about what belongs in this room. Half of what ends up on a desk is actually kitchen mail or kids’ school papers that wandered in.
Measure before you buy anything. A desk under 40 inches wide needs wall-mounted storage, not trays and carts — you don’t have the floor space to spare. Wider desks and full rooms can handle a rolling cart or side table.
Place big pieces first: desk, chair, filing cabinet, shelf unit, cart. Everything else builds around these.
Then work the desktop. Establish a clear zone in the center for actual work. Daily-use items go on your dominant-hand side only — I’m right-handed, so my pen cup, notepad, and phone stand live on the right, nothing on the left except my monitor riser.
Layer in paper control: inbox, action file, shred box. If a piece of paper touches your desk, it should have exactly one of these three destinations within 48 hours.
Build vertical storage next. This is where pegboards and shelves go up, holding supplies that don’t need daily access.
Handle cables before you style anything else. Once decor is in place, you won’t want to unplug everything to route a cord sleeve. Do this early.
Style last, and sparingly. One lamp, one plant, one framed print. That’s the ceiling, not the floor.
Where Everyone Screws This Up
– Too much on the desktop. If it’s not used daily, it goes in a drawer or on a shelf. I had a stapler, three notebooks, and a charging dock permanently camped on my desk for a year before I moved them six inches into a drawer. Nothing changed except how the room felt.
– No cable plan. Loose cords make an otherwise organized desk look chaotic. Sleeves and a charging zone fix this in under an hour.
– No paper workflow. A pile is not a system. If you don’t have an inbox/action/file/shred structure, paper will always look messy no matter how nice your desk is.
– Buying containers before sorting. I’ve said it once already because it’s the mistake that wastes the most money. Sort first. Always.
– All open storage. Baskets and open shelves look great in photos and terrible after two weeks of real use, because everything is visible all the time. Mix in closed drawers and cabinets so some things just disappear.
– No maintenance habit. A weekly five-minute file sweep and a daily 60-second desk clear-off is what separates an office that stays organized from one that needs a full reset every few months.
Keeping It Looking Intentional Over Time
Stick to 2–3 main colors plus one accent — I run white, black, and light oak, with brass as my accent. That’s it. Every new purchase gets checked against that palette before it comes home.
Repeat materials on purpose. My shelf brackets, drawer pulls, and desk lamp are all the same matte black finish — small thing, but it reads as designed rather than accumulated.
Keep surfaces sparse. If you’re staring at more than four objects on your desktop, something needs to move to a drawer or shelf.
Use one label style everywhere — I use a $30 label maker with white labels and black text on every folder, bin, and drawer. Mixing handwritten tape labels with printed ones makes an otherwise clean system look sloppy.
For seasonal refreshes, swap a tray or basket rather than furniture. For style variety without starting over, try pairing clean Scandinavian storage with one bold pegboard in a color you actually like — it personalizes the space without undoing the organization underneath. Or lean corporate: a real filing cabinet, hanging folders, matching desk organizers, softened with one woven basket so it doesn’t feel like you’re working in an insurance office.
The system holds as long as everything has exactly one home. That’s the entire trick — not the baskets, not the labels, just giving every object a single place it goes back to.
For another angle on this, my home office ideas guide covers the same space from a different starting point.